You asked, we answer: Taking care of your own archives
(Editor’s Note: This post was originally published on The Smithsonian Archives’ blog, The Bigger Picture.)
As many of you may know, a couple weeks ago, as a part of the Smithsonian’s October Archives Month celebrations, Smithsonian Institution Archives experts answered your questions about your own personal archives. The Facebook Q&A session we held over at the main Smithsonian Facebook page was a great success, and so we wanted to highlight some of the interesting questions that came out of the session. A big thank you, again to you all for your wonderful questions, and a big thumbs up to our two experts, Nora Lockshin, SIA’s Paper Conservator, and Lynda Schmitz Fuhrig, SIA’s Electronic Archivist, for taking the time to answer these questions.
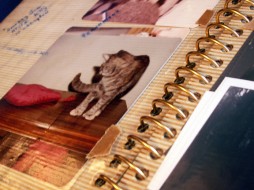
Q: How do you remove photographs from an old album that is falling apart or damaged?
A: It depends on what type of album the photographs are in. But before you remove any photos from an album, make sure that you note any inscriptions with names, dates, and places from each album page, and consider taking a high resolution picture of each page so that any information can be remembered and recorded. If you are removing photos from a “magnetic” or sticky album, one of our Conservation Fellows at SIA cooked up a handy-dandy video last week demonstrating how to remove photos from these albums with floss. If you are removing photos that are held in by photo corners, Nora notes that these photos can usually be removed “by very carefully slitting the fold of the ‘photo corner’ with a thin flat metal spatula or a very thin and rounded butter knife (not a thick or pointy one!). Be sure to hold the tool flat and parallel to avoid gouging the photo itself. You can protect the photo by covering it with an index card while you work at the photo corner. Do this all the way around rather than trying to flex the photograph itself. You can also slide the tool under the photo and photo corner and sometimes the corner will just pop off from weakened adhesive (sometimes they have come off already). If the photo is stuck directly to the page, then you can try to see if the tool can slip through the adhesive but you risk tearing the photo or splitting its layers, so go very slowly and keep your eye on level with your tool, watching and feeling for resistance or tearing at all times.”
Q: Two of my photos are stuck together. What is the best way to get them unstuck?
A: Nora notes, “Unfortunately, depending on what kind of photos you have and how they became stuck together (a condition we call ‘blocked’), they may be very difficult to get apart without further damage. Do not try to use water to separate images that are stuck together because the pictures probably became stuck together due to high humidity or contact with water, and the very many different types of photographs through the centuries can react very differently to water. Water will soften the image coatings and image itself, and the dyes if there are any, or writing inks that may be on the backs of pictures. These could easily fade or change in water and spread into the other pictures, and also photos become very vulnerable when wet – you could end up separating layers within each photograph. If you don’t have negatives for these anywhere, and the images are unique and precious to you, you should consider contacting a photograph conservator through the professional organization the American Institute for Conservation, and click on Find a Conservator and How to Select a Conservator to find a professional conservator in your geographic area.”
Q: What is the best way to store old photographs?
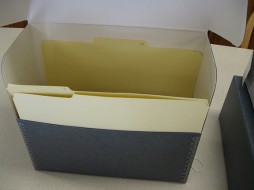
A: There are a few options for storing old photographs, Nora says, “from new albums to organizing photos in envelopes, or clear sleeves that wrap around the photograph and have adhesive on the sleeve to affix to the album. You should look for supplies made only of photo-safe components of plastics (polyethylene, polypropylene, or Mylar/Melinex polyester) or acid and lignin-free paper. Beware of applying adhesive directly to a photograph, even if it says “acid-free”. Adhesives should never touch the original, and acid is not the only problem associated with self-stick tapes.” These can then be placed in an archival folder or photo album. The Smithsonian does not recommend any one archival supplier, but you can do a Google search for supplies, or there are lists online from our colleagues in the Smithsonian and the National Archives and Records Administration of suppliers that you may contact.
Q: What is the best way to store family papers or documents, such as old marriage certificates?
A: Nora recommends choosing an envelope or L-sleeve made of the materials mentioned in the above question about storing photographs. “If you choose plastic, choose a document holder that has a piece of paper or acid/lignin free insert for behind the certificate. This will give the support the fragile document needs and also absorb acid.“
Q: Should I take digital photographs of analog photographs, documents, etc. as a cost effective way to preserve and store these items for additional “back-up” and peace of mind?
A: Lynda notes that taking photographs of items is one way of digitizing items, especially when those items are very fragile. Another option for that material that is in good shape, is to scan it. Lynda recommends saving those digital images onto a computer that is backed up, and to keep the images on external media, such as a thumb drive or external hard drive: “Multiple copies are wise. Don’t rely only on a photo-sharing service online. You will also need to plan for future upgrades with your hardware and software to make sure you can still access the images.”
Q: If I am going to scan items in order to preserve them, what resolution should I scan them at, and what file format do you recommend?
A: Lynda says, “For images we use no less than 600 ppi to yield a minimum of 6,000 pixels along the long axis, as part of our best practices. For example, images more than 10 inches in length should have the resolution set to 600 ppi. Color is saved as 24-bit TIFF and grayscale is saved as 8-bit TIFF. TIFF is a lossless format, while JPEG uses lossy compression, meaning a loss in quality when edited. These TIFFs will create large files and depending on your needs, a minimum of 300 ppi could work. Documents can be saved as PDF/A (A for Archival) or PDF. Again, 300 ppi should result in a good quality file.” You can also find some great tips from the SIA digitization standards.
Q: I have a large quantity of important documents that I want to scan, but I don’t want to do it myself. Can you recommend any companies that I can trust to keep my materials safe while creating archival quality scans?
A: As noted before, the Smithsonian does not recommend any one archival company. However, a quick internet search using keywords such as “digitization of family papers,” “conservation,” or “preservation” should yield results. The “Find a Conservator” feature at the American Institute for Conservation may be helpful and the Regional Alliance for Preservation also maintains a list of public and private archival companies who could provide this service. Our expert notes, “You want to look for a vendor that has experience, good equipment, quality assurance steps, customer recommendations, and follows industry standards. The company will provide you proper shipping and handling tips.”
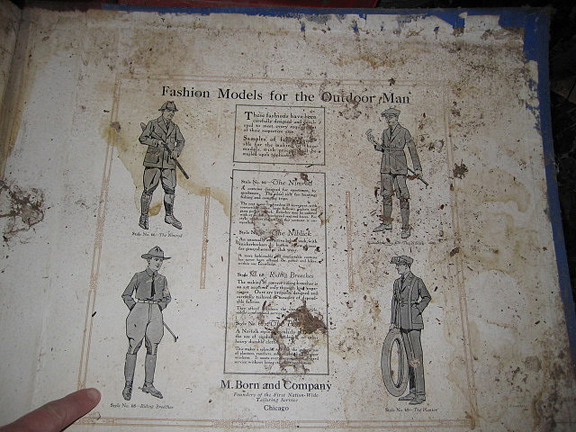
Illustration in a moldy book, by Shannon Ramos, Creative Commons: Attribution 2.0.
Q: I’m trying to scan some of my old documents, but I noticed that they’re moldy. What should I do?
A: If the objects are of low-value, you might consider making a high-quality scan or photocopy and then dispose of the item if the mold is presenting a health hazard or a hazard to other collections. A good place to start before you move ahead is to read up a bit on mold in this helpful pamphlet from our colleagues at Lyrasis. Nora has specific advice about working with the moldy documents: “If the moldy material seems dry to the touch and not smeary or highly smelly, it is probably dormant. But still consider wearing an N-95 rated particle mask (available at hardware stores) when you handle it. If your work surface is not cleanable at the end of the day with a bleach solution (10% in water), you can lay out the materials on a disposable surface such as clean unprinted newsprint (available at shipping/moving stores) and gently wipe the documents with cotton balls on both sides and then discard the wiping materials & newsprint on the same day. Be careful of any rips in the paper that may catch on the cotton, and do not use this approach if the writing or drawing is in soft pencil, charcoal, pastel or other media that may smear! For the scanner, have several static-attracting dust wipes to wipe the surfaces at the ready. These can be washed in a bleach solution and reused in the future. Avoid the use of ammonia and bleaches near photographs and documents as the fumes can affect the silver and dyes! . . . Lastly, be sure to keep the documents in a clean, airy, stable environment. Mold is most often dormant, not dead, and can bloom again in elevated relative humidity over 50%.”
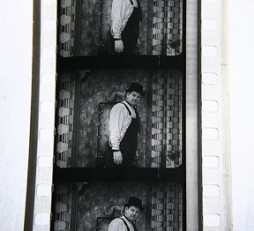
Q: I have an old 35mm family film that I would like to convert to DVD, but I can’t find any company or resources online. Do you have suggestions?
A: This is a problem that so many of us have. Nora recently discovered a preservation resource list that she liked on the Home Movie Day website, which is maintained by the Center for Home Movies organization. She recommends that until a film like this is digitized, “be gentle with the film and don’t try to project it until you find out more, because film can become brittle and shrunken and no longer fit sprocket holes. Wearing gloves, you can try to unreel a couple feet into the film and see if you can make out anything more significant, but since its not actually on a reel, keep it flat on a surface, because this is pretty risky.”
Q: Is there a way to capture a record of how my old social media profiles (like MySpace) looked and the information they contained before I shut them down?
A: Lynda says, “SI Archives and other organizations are exploring various archival solutions right now with social media sites. There are numerous issues to consider with third-party sites, such as restrictions on crawling (capturing a site using a software tool like Heritrix or HTTrack), who owns the content, what the host can do with the content, etc. There is no one-size-fits-all solution for every social media site. If you are looking for something simple, you can create a PDF snapshot of the page. There are a number of options available for capturing your Tweets as well, including Searchtastic and Twapper Keeper. In the meantime, Facebook announced a few weeks ago that it was enabling a feature for users to be able to download all their information. Perhaps some other sites will follow suit.”
Catherine Shteynberg is Social Media and Marketing Coordinator with Smithsonian Institution Archives.
Posted: 9 November 2010
- Categories:
